MindCuber.com
Build your own LEGO® MINDSTORMS® robot to solve the Rubik's Cube®...
MindCub3r is a robot that can be built from a single LEGO MINDSTORMS EV3 home set (31313) or from EV3 Education Core and Expansion sets (45544+45560) to solve the well known Rubik's Cube puzzle.
All MindCub3r software releases should work with LEGO EV3 firmware versions from v1.06H (home) and v1.06E (Education) onwards. It is recommended that the EV3 firmware is always updated to the latest version released from LEGO.
Construct the robot by carefully following the build instructions (Home) or build instructions (Education) and then download and install the software described below.
MindCub3r software consists of three main parts:
a project file: MindCub3r-v2p2.ev3 or MindCub3r-Ed-v2p2.ev3, containing the motor and sensor control program created using the standard LEGO MINDSTORMS EV3 graphical programming environment
an executable program: mc3solver-v2p2.rtf, compiled from C++ that implements an efficient solving algorithm that can find much shorter solutions than the NXT MindCuber variants
an EV3 application: "MC3 Solver v2p2", that is used to launch the mc3solver-v2p2.rtf program
Note: release v2p2 uses the .rtf extension to enable the files to be downloaded using the standard LEGO MINDSTORMS EV3 software. The .rtf extension is intended to be used for files containing text so using if for the executable program is a work-around. Please do not try to open this file with a text editor.
MindCub3r uses the EV3 color sensor in RGB mode to enable it to measure colors that cannot be distingished by the standard color mode provided by the standard LEGO MINDSTORMS EV3 software. The Color Sensor RGB Block must be imported into the LEGO MINDSTORMS EV3 software to support this mode.
NOTE: LEGO MINDSTORMS EV3 software for Mac OS from version 1.4.0 no longer supports importing blocks such as the ColorSensorRGB block. In this case there is an alternative method to download the MindCub3r software to the EV3 using a micro-SD card.Extract the file from this archive.
On a computer running Windows, find the file in Windows Explorer, click with the right mouse button and select Extract all...
This archive contains:
Start the LEGO MINDSTORMS EV3 software and create a new, empty project.
Select the Tools menu and then Block Import.

In the Block Import and Export dialog, select Browse.

Find the file ColorSensorRGB-v1.00.ev3b on your computer and Open it.

Select ColorSensorRGB-v1.00.ev3b from Select Blocks to Import and then select Import.

To complete the installation, close the dialogs and exit from LEGO MINDSTORMS EV3 software.
Download the appropriate file to your computer:
Note: previous versions are still available here
Extract all the files from this archive.
On a computer running Windows, find the file in Windows Explorer, click with the right mouse button and select Extract all...
This archive contains:
Start the LEGO MINDSTORMS EV3 software and select the File menu then Open Project.

Find the MindCub3r-v2p2.ev3 or MindCub3r-Ed-v2p2.ev3 project file and Open it.

Download the MindCub3r program to the EV3 (but do not run it yet).

Select the Tools menu and then Memory Browser.

Select Brick (or SD Card if there is a micro-SD card in the EV3) and find and select MindCub3r-v2p2 or MindCub3r-Ed-v2p2 in the Projects folder and then select Download.


Find the folder on the computer where the files were extracted from MindCub3r-v2p2.zip or MindCub3r-Ed-v2p2.zip. Select mc3solver-v2p2.rtf and Open to download this program to the EV3.

Select Download again from the Memory Browser dialog.
Find the folder on the computer where the files were extracted from MindCub3r-v2p2.zip or MindCub3r-Ed-v2p2.zip. Select InstallMC3-v2p2.rbf and Open to download this file to the EV3.

Close the Memory Browser dialog.
Go to the Run Recent screen on the EV3.

Press the right button on the EV3 to move to the File Navigation screen. Select the MindCub3r-v2p2 or MindCub3r-Ed-v2p2 folder and press the center button to open it. If there is a micro-SD card in the EV3, select and open the SD_Card folder first.


Use the down button to Select InstallMC3-v2p2 and press the center button to run it. The EV3 will make a short beep.

This installs "MC3 Solver v2p2" application on the Brick Apps screen.

Turn off the EV3 brick to ensure all the files are saved to the flash memory and then turn it on again.
MindCub3r is now ready to use!
Run the "MC3 Solver v2p2" application on the EV3 from the Brick Apps screen to start the mc3solver-v2p2.rtf executable program.
This is only necessary once each time the EV3 is turned on as the program will continue to run in the background until the EV3 is turned off.
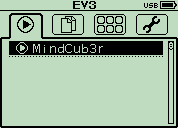
Run the MindCub3r program on the EV3 from the Run Recent screen or from the File Navigation screen if it is the first time it has been run.

The program first resets the position of the scan arm (holding the color sensor) and then the tilt arm. If the turntable starts to rotate or the two arms do not move in this order, please carefully check that cables have been connected to the correct ports on the EV3 as shown by the color coding in the build instructions. During this period, the EV3 buttons flashes red.
The program then connects to the mc3solver-v2p2.rtf program that was downloaded to the EV3. If the program is found, the EV3 makes a short beep and continues. If the solver program is not running, the buttons continues to flash red and the message "Find solver" is displayed on the EV3 screen. If this happens, please check that the "mc3solver-v2p2.rtf" program has been downloaded to the MindCub3r-v2p2 or MindCub3r-Ed-v2p2 project folder on the EV3 and that the "MC3 Solver v2p2" application has been installed and run once.
When MindCub3r is ready to start, the EV3 buttons turn orange and the message "Insert cube..." is displayed on the screen.
Gently turn the turntable in each direction with your finger so that it moves slightly because of "play" in the gears connecting it to the motor. If necessary, adjust the position of the motor so that there is an equal mount of play in each direction. Use the left and right buttons on the EV3 to do this. A short press nudges the motor by a small angle. Holding the button for longer moves it by larger angles more quickly.
Insert a scrambled Rubik's Cube into the turntable tray and MindCub3r will start to scan and solve the cube.
MindCub3r may scan the cube up to three times if it is unable to determine the colors at first. If the scanned colors do not result in a valid pattern, MindCub3r will stop after the third attempt and display the message "Scan error" on the EV3 display. If this happens, there may be a number of possible causes. See the troubleshooting section.
MindCub3r can solve the cube directly into patterns or scramble it. Before inserting the cube, use the up and down buttons on the EV3 to select a specific pattern, "All" to create each pattern in turn or "Random" to cause MindCub3r to solve normally and occasionally generate a random pattern. Selecting "Scramble" will make MindCub3r scramble the cube without scanning it.
If there is a cube present before MindCub3r is ready, the buttons will stay red and the message "Remove cube..." is displayed for you to remove the cube. If this happens even when no cube is present or if MindCub3r does not start to scan the cube when it is inserted, please check that the cables to the infra red or ultrasonic and color sensors are connected to the correct ports on the EV3 as shown in by the color coding in the build instructions.
Installing Danea Professional Manager 5 (DPM 5), specifically Revision 17.32, allows users to manage legacy databases with a reliable accounting and administrative tool. While Danea Soft has transitioned its focus toward modern solutions like Easyfatt and Fatture in Cloud, Danea Professional Manager 5 remains a "descendant of a glorious family" of software popular since the 1990s. Overview of Danea Professional Manager 5
Danea Professional Manager 5 is the natural evolution of Danea Family Manager. It is primarily used for:
Legacy Data Management: Ideal for those needing to access and manage older databases.
Accounting Integration: It can acquire "prima nota" (initial entry) data from modern Danea Easyfatt installations.
Administrative Control: Provides foundational tools for professional and organizational management. Installation Guide: Danea Professional Manager 5 Rev. 17.32
To ensure a successful installation of Revision 17.32, follow these standard procedures for Danea software. 1. System Requirements
Before installing, ensure your hardware and software environment are compatible: danea professional manager 5 rev 17 32 install
Operating System: Revision 17.32 is compatible with Windows versions ranging from Windows 7 and 8.1 to Windows 10 and 11 (both 32-bit and 64-bit architectures).
Frameworks: Often requires the .NET Framework and standard Windows administrative permissions. 2. Pre-Installation Steps
Backup: If you are upgrading from an older revision or Danea Family Manager, back up your existing database files (.dpm or .dfm).
License Check: Ensure you have your activation code ready. Use of this software is governed by the DPM License Agreement. 3. Execution of the Installer
Download: Obtain the Rev 17.32 installer package from an official distributor or through your Danea customer portal.
Run as Administrator: Right-click the .exe file and select "Run as Administrator" to ensure all registry entries and system folders are correctly updated. Installing Danea Professional Manager 5 (DPM 5) ,
Directory Selection: It is generally recommended to use the default path (typically C:\Program Files\Danea Professional Manager 5) unless you have a specific partitioned environment for legacy software.
Completion: Once the progress bar finishes, restart your computer to ensure all background services for the database management system are initialized. Troubleshooting Revision 17.32
If you encounter issues during the "32 install" phase (referring to 32-bit architecture or specific installation steps), consider the following:
Compatibility Mode: If running on Windows 11, try setting the shortcut compatibility to "Windows 7" or "Windows 10".
User Rights: Ensure the user account has full read/write access to the database folder to prevent errors when opening existing records.
Support: While DPM is a legacy product, technical documentation is often archived on the official Danea Support site. Software Requirements - Omnissa Docs Q4: The installer asks for a “Master Password”
Note: Danea Professional Manager 5 is considered legacy software. The latest versions have moved to "Danea Easyfatt" or "Danea Team". Ensure you have a valid license key and installation files before proceeding.
A: This is a security feature for encrypted databases. If you never set one, leave it blank. Otherwise, enter the password defined in your previous installation.
Contact vendor support if you encounter licensing issues, migration failures, or data corruption. Provide:
Now, let’s execute the danea professional manager 5 rev 17 32 install process.
Click Next. Accept the End-User License Agreement (EULA).
A: Navigate to C:\ProgramData\Danea\PM5\Logs and open the latest error.log. Common fix: delete the file preferences.xml (the software will rebuild it).
Rushing the installation leads to errors. Follow this checklist before you double-click the installer:
C:\ProgramData\Danea\PM5\Data).See more LEGO robot Rubik's Cube solvers at youtube.com/IAssemble
Copyright © 2013-2020 David Gilday
LEGO and MINDSTORMS are trademarks of the LEGO Group
Rubik's Cube is a trademark of Rubiks Brand Limited

